Header - Steps
Bend-Tech 7x Wiki :: Header Design :: Steps
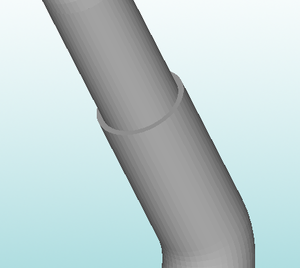
In the Step stab, steps/changes in material can be added to tubes. Steps are either an increase or decrease in material diameter at a given point on the tube. After the chosen point, the rest of the part will be changed to the selected new material. See image below for an example.
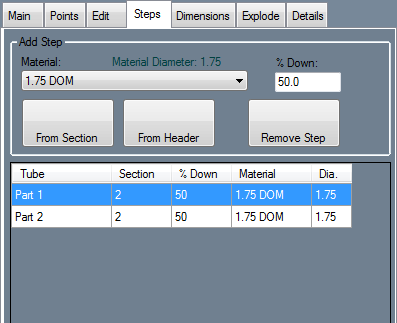
To add a step, first enter how far down the straight the step should be located in the % Down field. The location is chosen by giving a percentage. For example, if 50 is entered, the step will be start at the halfway point of the section.
Choose the material that the part will switch to at the step location by clicking the drop down menu next to Material and select a material from the list. Once a material has been selected, the diameter of the material will be shown below the material drop down menu next to 'Material Diameter'.
Once the proper location and material have been chosen, click the From Section or From Header buttons. Clicking the From Section button will place the step the given percent down the selected section, starting at the beginning of the section. Clicking the From Header button will place the step the given percent down the tube, starting at the beginning of the header tube.
Once step(s) have been added, each will be shown in the chart at the bottom of the Step tab. Each entry will show which tube the step was added to, which section on the tube, the location of the step, the name of the material used after the step, and the diameter of the material after the step.
To remove a step, first click the Remove Step button then click on the step to delete it.

